How to setup Seedbox on Hetzner
There will be a guide how to setup Dedicated server bought from Hetzner as your personal seedbox.
Buying a server
First of all - we need a server.
I personally prefer buy one from Hetzner server auction.
And I prefer that for next reasons:
- They cheap. Their cost start from 28.70 euros (at time I writing this)
- They good. For their price. So for mentioned above price you can get server with Intel Xeon E3-1275V6, 64GB RAM, SSD and Unmetered 1gbit uplink. It’s an awesome deal.
- A lot of configurations presented. You can find, I think, almost everything you can imagine. Even servers with GPU are present in list.
- Desktop processors with iGPU. Like i7-6700, with integrated Intel HD Graphics your Plex or Jellyfin can encode your streaming assets much faster (and better).
- Instant setup. Almost. And only in working hours. :)
So, use filters on page, and select server which will satisfy your requirements. Then press order and simply wait for it availability. On server setup you will receive an email with access info, such IP and root password.
Install OS
Server came from Hetzner in “Rescue mode”. So it doesn’t have any OS installed and we need to install one.
First of all, we need to connect to server. I’m mostly use Windows as my desktop home OS, so I personally will recommend PUTTY SSH Client. Select a build of putty.exe which match with your current OS, download it and launch.
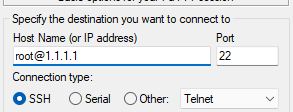
You will get this interface:

Enter your server IP (you got it in email or you can check it on Hetzner website) into “Host name” field and add “root@” in front of it. So you will try to connect to your server as root by default. Also, you can enter your server name in field under “Saved Sessions” label and press save, so you will have a quick access to your server in future.
So it will look like this:
You will be asked to accept server key, be okay with it. Then, after SSH connection will be established, server will ask you for a password. Copy it from Hetzner email and paste into PUTTY window with Shift+Insert hotkey. Remember: Password is not shown in terminal session, so just hit enter after pasting your password.
On logging in you will be welcomed with some system information by “Rescue mode” in which your server currently booted. This mode will allow us to install OS, format and configure our file system and launch our freshly installed OS.
To start installation process you need to enter next command into terminal:
installimage
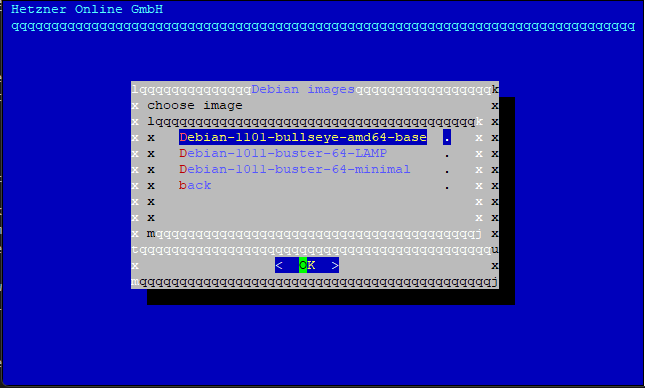
It will launch something I personally can call a GUI, and will ask you about OS you prefer. I highly recommend to go with Debian or Ubuntu, first of all, because next steps will rely on application called Swizzin, and this application have support only of Debian and Ubuntu systems. In guide below I will go with Debian 11.01 as you can see by my screenshots.

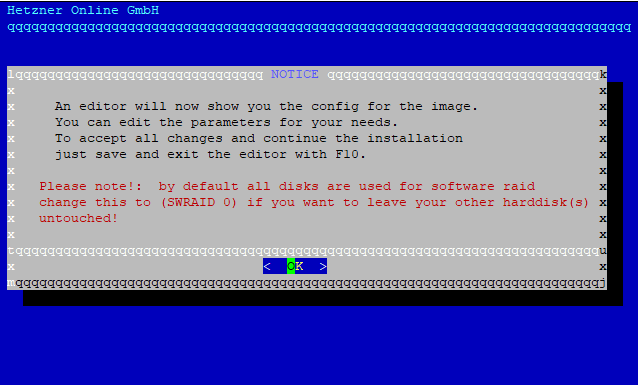
After OS type and version selection you will asked about detailed server configuration. Unfortunately it can be tuned only by plane text editor in terminal, but Hetzner installimage script will at least open it for you and add a lot of examples and explanations about what every lane is about.

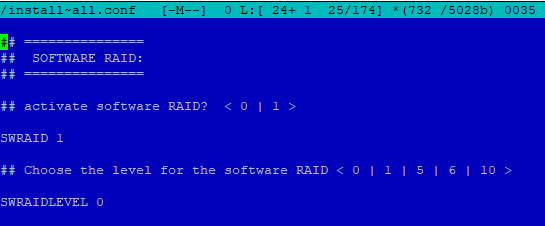
First of all, we need to change RAID type from one which was preset to RAID 0. RAID 0 allow your drives to cooperate and work as one simultaneously, and it will reduce IO WAIT.
By lines presented on my screens we need to check, if SWRAID turned to 1. And check SWRAIDLEVEL switched to 0. In my case SWRAIDLEVEL was set 6 and I changed it to my desired 0.

After changes raid section of config shall be like this:
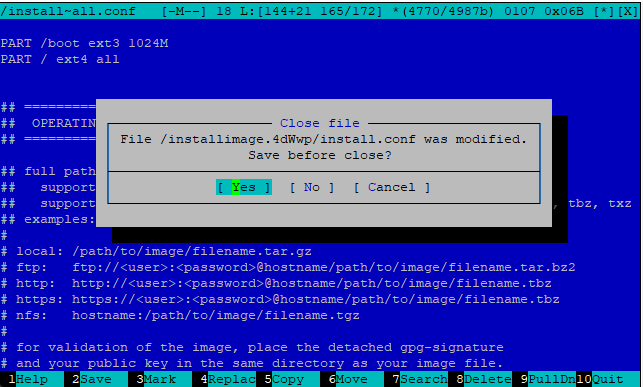
Next, we need to setup partitions and determine our filesystem. Initially in config we can see lines about swap, system partition and partition for /home directory. In my opinion - SWAP is useless for seedbox and only thing it will do, increase your server IO WAIT. So I remove swap and /home directory partition. Then throw “all” space to just root directory.

At the end your partition lines shall look like this:

Then hit F10 for file save and exit. You will be asked about saving modified config. Sure we are.
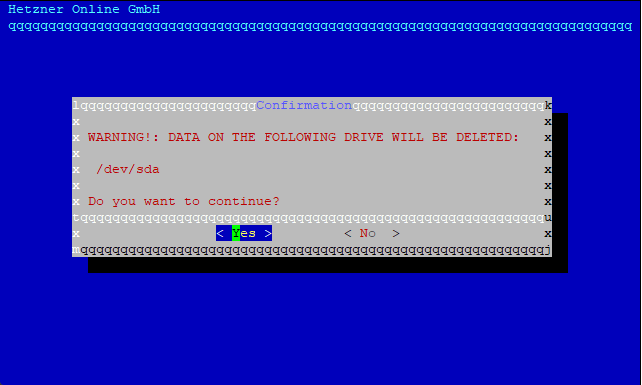
Then there be a warning about data loss on your drives, but as we don’t have any data on them - it’s ok. Press Yes.
After all this steps OS installation and setup process will start. Just wait for it to end.

After all setup steps, we need to reboot our server to OS from “Rescue mode” by simple command in our terminal:
reboot
Putty will notify you about connection lost. It’s ok because we just sent our server to reboot. :)
Install Swizzin and stuff
Swizzin
What is Swizzin? It’s a pack of various utility scripts + web panel which will allow you easily access and control your seedbox services. Like Plex, Jellyfin, Sonar, Torrent clients and many other applications.
Connect to your server back with root password and IP from hetzner email. After reboot it shall be loaded into Debian (or other OS you choose). When connecting accept server key again. After connection is established you will be greeted by your OS.
First of all, before installing Swizzin we need to update our system. And, as we logged to our server as root, run next commands:
apt-get update
apt-get upgrade
First command will update information about available apps and their versions. When second command will do an update over all installed stuff in our system based on information it got from first one. You need to pass “y” to second command as proof you are want to update your apps.
Then we need to open Swizzin website.
On Swizzin website you need to press Get Started and you will be scrolled to block with a commands which will allow you to download and initiate Swizzin installation. Just hit copy on command and paste it to your terminal.
I prefer to go with wget:
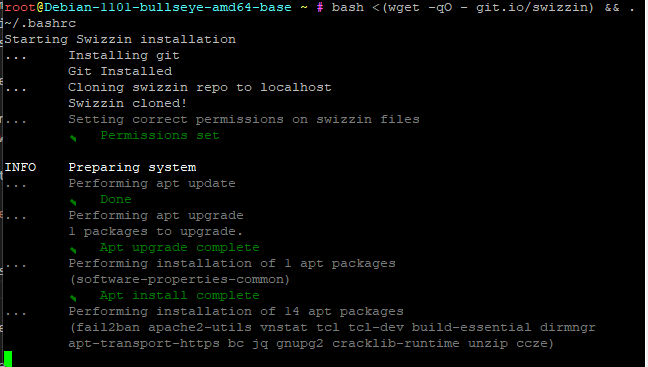
bash <(wget -qO - git.io/swizzin) && . ~/.bashrc
After this command Swizzin installation process will start:
When Swizzin installed all necessary and basic packages to your server you will be greeted by a “GUI” of Swizzin:
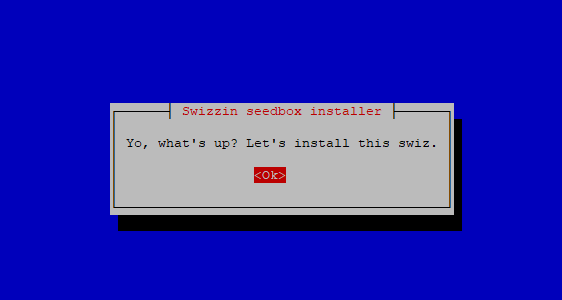
Enter your desired username. Paste or type your password, which will used for Swizzin access, or press enter, so Swizzin will generate one for you. Confirm password.
Apps
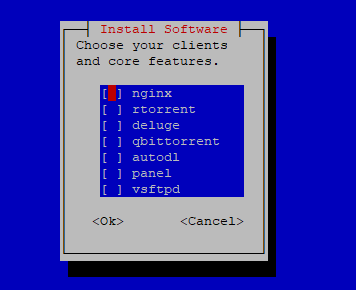
Then you will be asked about apps you want to install, checkbox will switch state by pressing space. I usually go with next ones:
First page:
- nginx
- panel
- qbittorrent
Hit tab to switch to buttons and press OK after choosing apps
Second page:
- letsencrypt (if you have your domain)
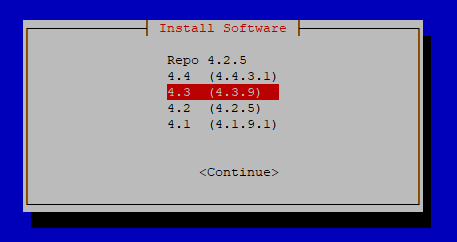
Next you will be asked about qbittorrent version, I highly recommend to go with 4.3.9 one, because it still use old libtorrent. New libtorrent have a lot of downsides, starting from memory usage, connectivity issues and has almost zero profits. At least it applies at time when I’m writing this
Domain setup (if you have one)
If you have domain, and it tied to Cloudflare so you probably want to tie it with your seedbox.
I prefer to go with subdomain, so for do this on Cloudflare you need to create A type record with your server IP address
Example:

Then in installation process of swizzin at moment when it will install letsencrypt you will be asked about your domain, Cloudflare API key and email. To insert API key press Shift+Insert in SSH terminal.
To get Cloudflare API key you need to go here. Then press View at your Global API key.
Access seedbox
Enter your domain (or IP) in your browser and hit Enter. You see swizzin login page.

After you logged in you can see your server/seedbox stats. How much memory and disk space used, system load, io wait, status of installed applications and list of them. If you followed my guide, you will have only qbittorrent available. On pressing on it, you will be redirected to qbittorrent login page and you can use your swizzin login and password to access it.
Install more apps
Connect to your server once again and type box into terminal:
box
It will open swizzin terminal GUI which will allow you to simply manage your installed applications. By manage I mean installing and uninstalling them.
For additional info you can always check swizzin site where all swizzin applications are categorized and have brief description about what they do and how to manage them.
Tune server, a little
First of all and most useful tune you can do - update your sysctl.conf file.
So open a premade sysctl.conf file. Press ctrl+a in it, then ctrl+c and then do next stuff in your terminal:
nano /etc/sysctl.conf
Scroll to end of file
Open sysctl.conf file content from this link
Hit shift+insert - that will paste stuff you copied
Press ctrl+x to exit
Press y to save modified file
sysctl -p
Last command will load updated sysctl.conf settings and everything will be set up for use.
Tune qBittorrent
Open qBittorrent Web UI from Swizzin. Go to Settings. Next things will go by Tabs.
Downloads:
- Check pre-allocate space for all files
Connection:
- Peer connection protocol: TCP Only
BitTorrent:
- Disable DHT (Hetzner is not very torrent friendly, as you probably already know)
- Disable PeX
- Disable Local peer discovery
Advanced:
- In interface choose External one, for my case it’s eno1
- In address field choose one attached to your server
- Uncheck Resolve peer countries
- Async I/O threads: 4 - I find out 4 is generally OKish number for HDD servers
- Hashing threads: 2
- Outstanding memory when checking torrents: 2048 - But it depends on how much RAM you have
- Disk cache: -1
- Disk cache expiry interval: 300
- Enable OS cache: checked
- Send upload piece suggestion: checked
- Send buffer watermark: 10240
- Send buffer low watermark: 3072
- Send buffer watermark factor: 200
- Socket backlog size: 3000
- Type of Service: 184
So at the end it should be looked like this:

So, that’s probably all! Have a good ratio!